
Azure stack vms azure replicate on-premises vmware vms
 |
|---|
Creating Virtual Machines (Portal)
Demonstration – Creating a VM in the Portal
In this demonstration, you will explore the Azure portal to: Create the virtual machine
Connect to the virtual machine
View the IIS welcome pageVirtual Machine Example (Part 2)
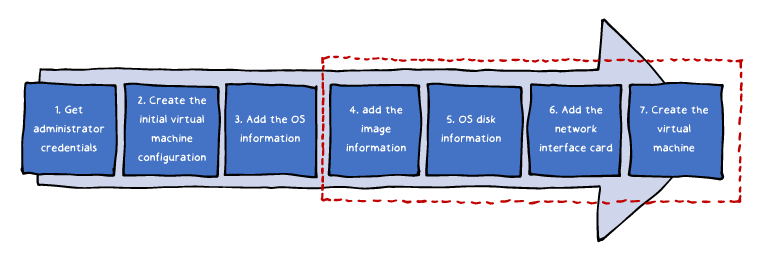
A sample provisioning (steps 4-7):
4. Add the image information to the virtual machine configuration: $vm = Set-AzureRmVMSourceImage -VM $vm -PublisherName MicrosoftWindowsServer ` -Offer WindowsServer -Skus 2016-Datacenter -Version latest
5. Add the operating system disk settings to the virtual machine configuration:
$vm = Set-AzureRmVMOSDisk -VM $vm -Name myOsDisk -DiskSizeInGB 128 `
-CreateOption FromImage -Caching ReadWriteAzure PowerShell-based example:
1. Identify ResourceId of all of the dependent resources:
Get-AzureRMResource -ResourceGroupName <sourceResourceGroupName> | Format-table - Property ResourceId2. Create a comma separated list of the ResourceIds and use the list as input of the Move-AzureRMResource cmdlet:
Move-AzureRmResource -DestinationResourceGroupName
"<myDestinationResourceGroup>" `
-ResourceId <myResourceId,myResourceId,myResourceId>

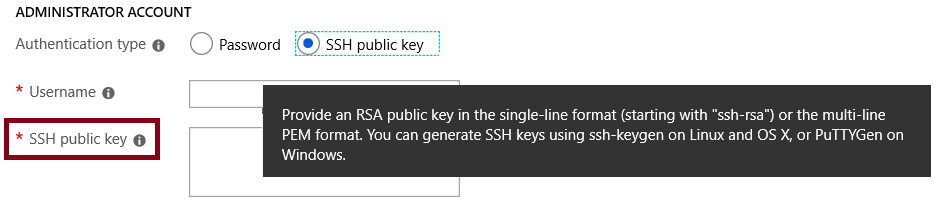
When you create a Linux VM, you can decide to authenticate with an SSH public key or Password.
Creating Virtual Machines in the Portal
Windows Virtual Machines
Windows VM Connections
Demonstration – Creating a VM in the Portal
PowerShell – Example (Part 1)
PowerShell – Example (Part 2)
Demonstration – Creating a Virtual Machine with PowerShell Linux Virtual Machines
Linux VM Connections
Demonstration – Connect to Linux Virtual MachinesCreating Virtual Machines in the Portal
Windows Virtual Machines
Demonstration – Create a VM in the Portal
Create the virtual machine
Connect to the virtual machine
Install the Web Server role
View the IIS welcome page
-Windows `
-ComputerName myVM `
-Credential $cred `
-ProvisionVMAgent `
-EnableAutoUpdatePowerShell - Example (Part 2)
|
|---|
$vm = Add-AzVMNetworkInterface -VM $vm –Id $nic.Id
# 7. Create the VM
New-AzVM -ResourceGroupName
myResourceGroupVM -Location EastUS -VM $vm
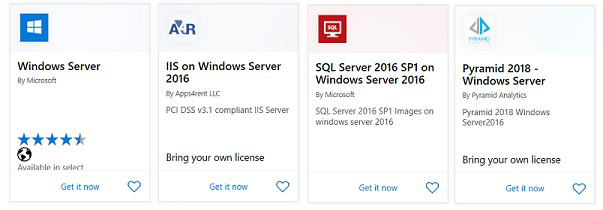
Marketplace
• Linux has the same deployment options as for Windows VMs Create the SSH keys
Create the Linux machine and assign the public SSH key Access the server using SSH
|
|---|
 |
|---|
System Center VMM, and
physical servers to a secondary
site
|
|---|
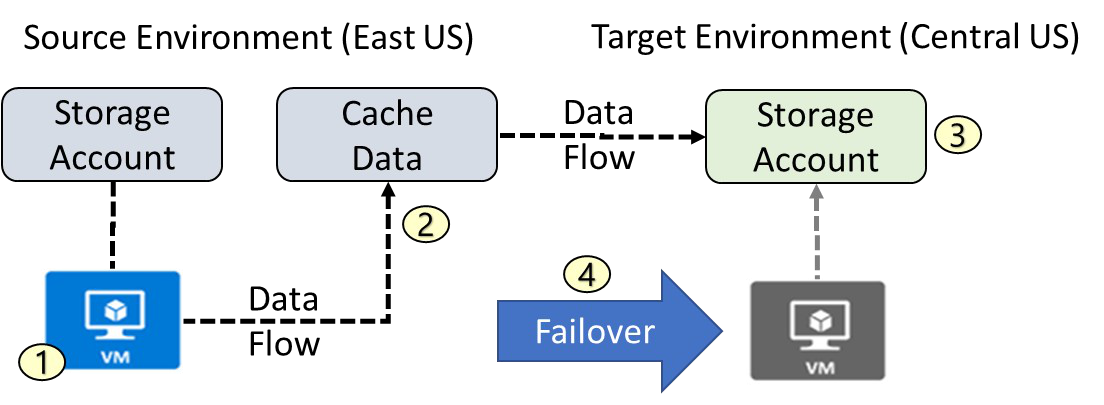
1. VM is registered with Azure Site Recovery
2. Data is continuously replicated to cache
3. Cache is replicated to the target storage account
4. During failover the virtual machine is added to the target environment
3. For the Backup extension to work, the Azure VM Agent must be installed on the Azure virtual machine.
Implementing VM Restore
App-aware backups, file/folder/volume backups, and
machine state backups (bare-metal, system state)
Each machine runs the DPM/MABS protection agent, and the MARS agent
runs on the MABS/DPM
Flexibility and granular scheduling options
Manage backups for multiple machines in a protection group
Backup Component Comparison
| Component | Benefits | Limits | Protects | Backup Storage |
|---|---|---|---|---|
|
||||
|
|
|---|
Custom Script Extensions
Extension scripts can be simple
|
|---|
|
|---|
The Azure VM Monitoring section in the Azure portal

Agent
Sinks (deliver diagnostics to other services, such as Application Insights)
Personalized cloud service for optimizing Azure deployments:
Analyzes resource configuration and usage telemetry
Offers recommendations grouped in four categories:
High availability: To ensure and improve the continuity of your business-critical applications. Security: To detect threats and vulnerabilities that might lead to security breaches. Performance: To improve the speed of your applications.