
Lets choose the default option select all clicking enter then
Setup working space:
1.zoom all pressing Z (enter) A (enter)
2.With the PAN tool place the UCS axes slightly
above
3.Check if the units are in mm: Initiate -> Drawing
Utilities -> Units em mm 4.In the status bar confirm
if the Grid is on, and turn the Snap
on.
5.Right-click on the snap icon to change the snap value to 0.1
Next, we’ll use the command Modify Offset (O) which allows making parallel lines. 2.Press the "O" key or the Offset icon, set the offset distance to 9 (and Enter)
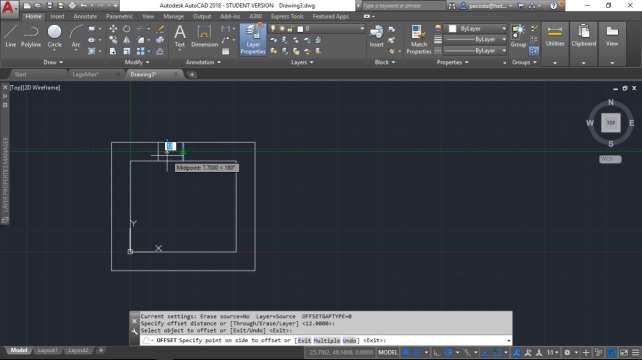
5.Make the Offset of this line measuring 12 on each side.
6.To cut off the bits of line we don’t need, we’ll use the command Trim (TR). After this command, let’s choose the default option <select all> clicking on Enter.
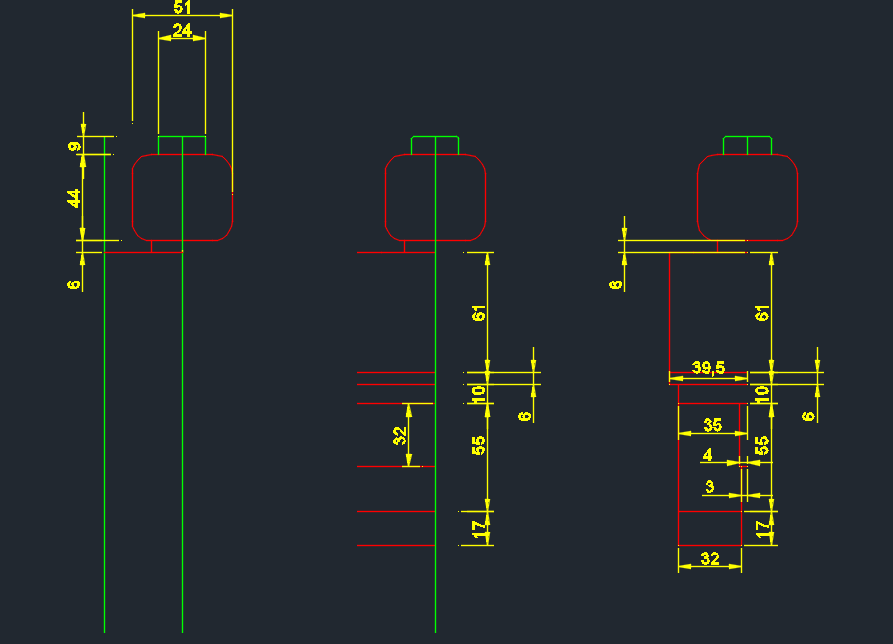
For the body drawing let's draw just one side. The other side will be a mirrored copy (Mirror).
1.Choose a central line and increase it to have a useful symmetry line.
2.With this line, make two offsets from the vertical line, to the left, with 15.5 and 39.5 of
distance in relation to the central line.
6.Create vertical lines like you see in the third figure.
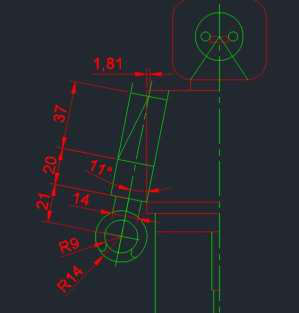
2.Round the shoulder and set the face:
TDES 4009 - Digital Drawing BA (Hons) Design