
When the last task the day completed and lodged
|
|
|---|---|
|
|
|
|---|
|
|
|---|---|
|
|
ENM1102 (2021)
(3) Adding (freehand) lettering on grid paper
• For techniques, refer to the topic of lettering (Sec1.3 - Boundy). Access via the Reading List.• Practicing character form, height and spacing on grid paper

ENM1102 (2021)
• Section A and Section B may vary based on enrolment mode and lab group.
• Completing the wrong requirements (i.e., not the correct enrolment mode or lab group) attracts a zero mark with the work not assessed (no feedback given).

based on
May vary single sheet(landscape) based on May vary
• No drawing templates, stencils, rulers or other drawing aids are to be used in scribing lines.
• When practicing out of class or in a (non-assessed) lab, you can however use: o a ruler to self-check line weights (i.e., how many 0.5mm lines can you fit between two graduations on a ruler) and proportions (dashes, gaps) o a protractor to check angles
ENM1102 (2021)
Engineering Drawing and Computer Aided Design Practice Drawing Task (Dr Abdellah Shafieian)
Completing the Task
• Lines (where applicable)
o Do not show hidden detail
o Show external detail (use continuous thick lines)
o Show centrelines where applicable (thin chain lines) o Show hatching lines
o Show dimensioning
o Show all (feint) construction / projection lines
• Draw the parts as close as possible to 1:1 scale on the grid paper.• The image for Part 1 and Part 2 may have not been taken / shown at the appropriate angles for a one-view drawing. As such, you may need to spatially re- orient the parts (off paper, i.e., “in your imagination”) before starting to draw. • Ensure the front and right sectional views are positioned on the same (single) paper in a manner that reflects third-angle orthogonal projections (i.e., their alignment and position to each other).
• For scribing numbers and letters, (if you want, optional) draw two (freehand, thin) horizontal lines which are spaced apart by the same distance needed for character heights (Table 1.2 – Boundy). Alternatively (optional), use the grid paper spacings to assist (instead of two horizontal lines). Take note of lettering styles, sizes, and consistency.


ENM1102 (2021)

• (A.4) Part 1 Write (in UPPERCASE lettering and using character heights/spacing for subtitles, headings, view and section designations) on a single row the labels shown below. These should appear under each of the one-view drawings.
Include the following text:
o Under each front view “FRONT VIEW OF PART 1”
o Under each right sectional view “SECTION X-X”
o Centred on the page (at the bottom, as a single line or two lines one under the other) “APPROXIMATE SCALE 1:1” and “ALL DIMENSIONS IN MILLIMETRES”
o Character heights (3.5mm, block type letters/numbers)
[10% of max marks]

ENM1102 (2021)
• (B.3) Part 2 Provide dimensioning for this part (any dimension for a feature should feature once only, but you are free to show spread the dimensioning between the front views and sectional views, provided you capture all dimensions and use correct dimensioning conventions). Take note of:
o Projection lines (weight, straightness, termination)
o Dimension lines (weight, straightness, termination)
o Showing (principal plane aligned) dimensions (all features)
o Applying arrow heads at 3:1 proportions, 3mm long, 1mm wide (consistency, size, termination)
o Using character heights/spacing for general notes, materials lists, dimensions
[10% of max marks]• (B.4) Part 2 Write (in UPPERCASE lettering and using character heights/spacing for subtitles, headings, view and section designations) on a single row the labels shown below. These should appear under each of the one-view drawings.


| Enrolment Mode (Lab Session) | Part 1 | Part 2 |
|---|
On-Campus
MON 1330 -
1530On-Campus
MON 1530 -
1730
Enrolment Mode (Lab Session) Online (Off-Campus)
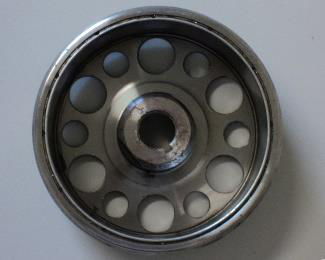
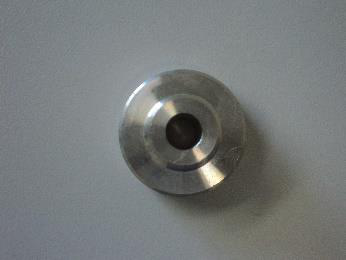
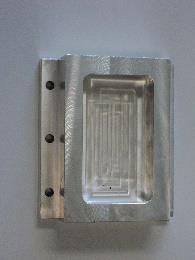
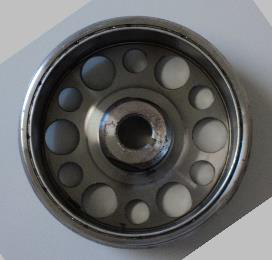
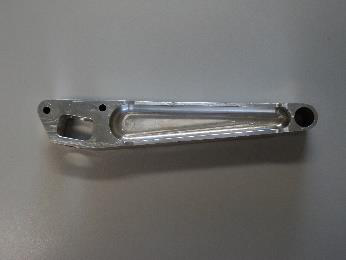
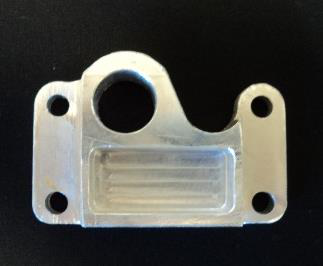
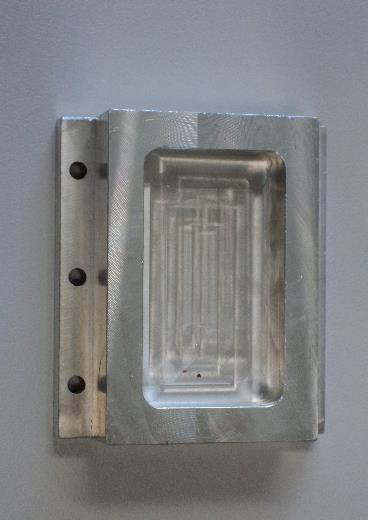
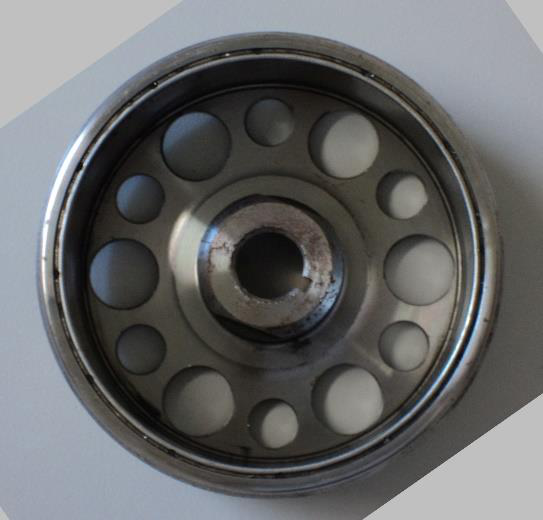
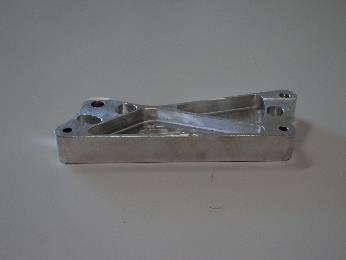
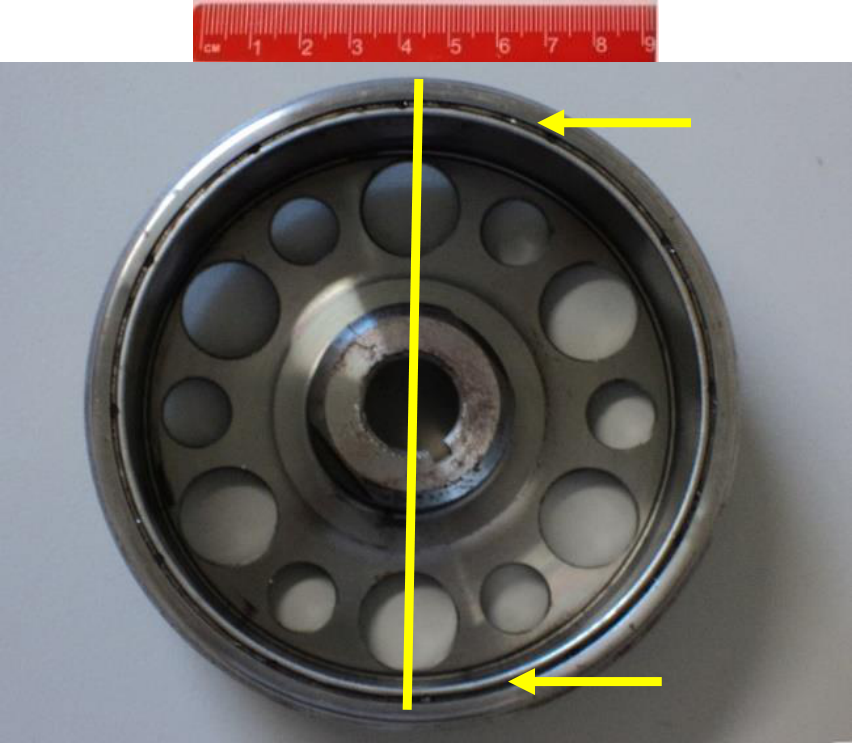
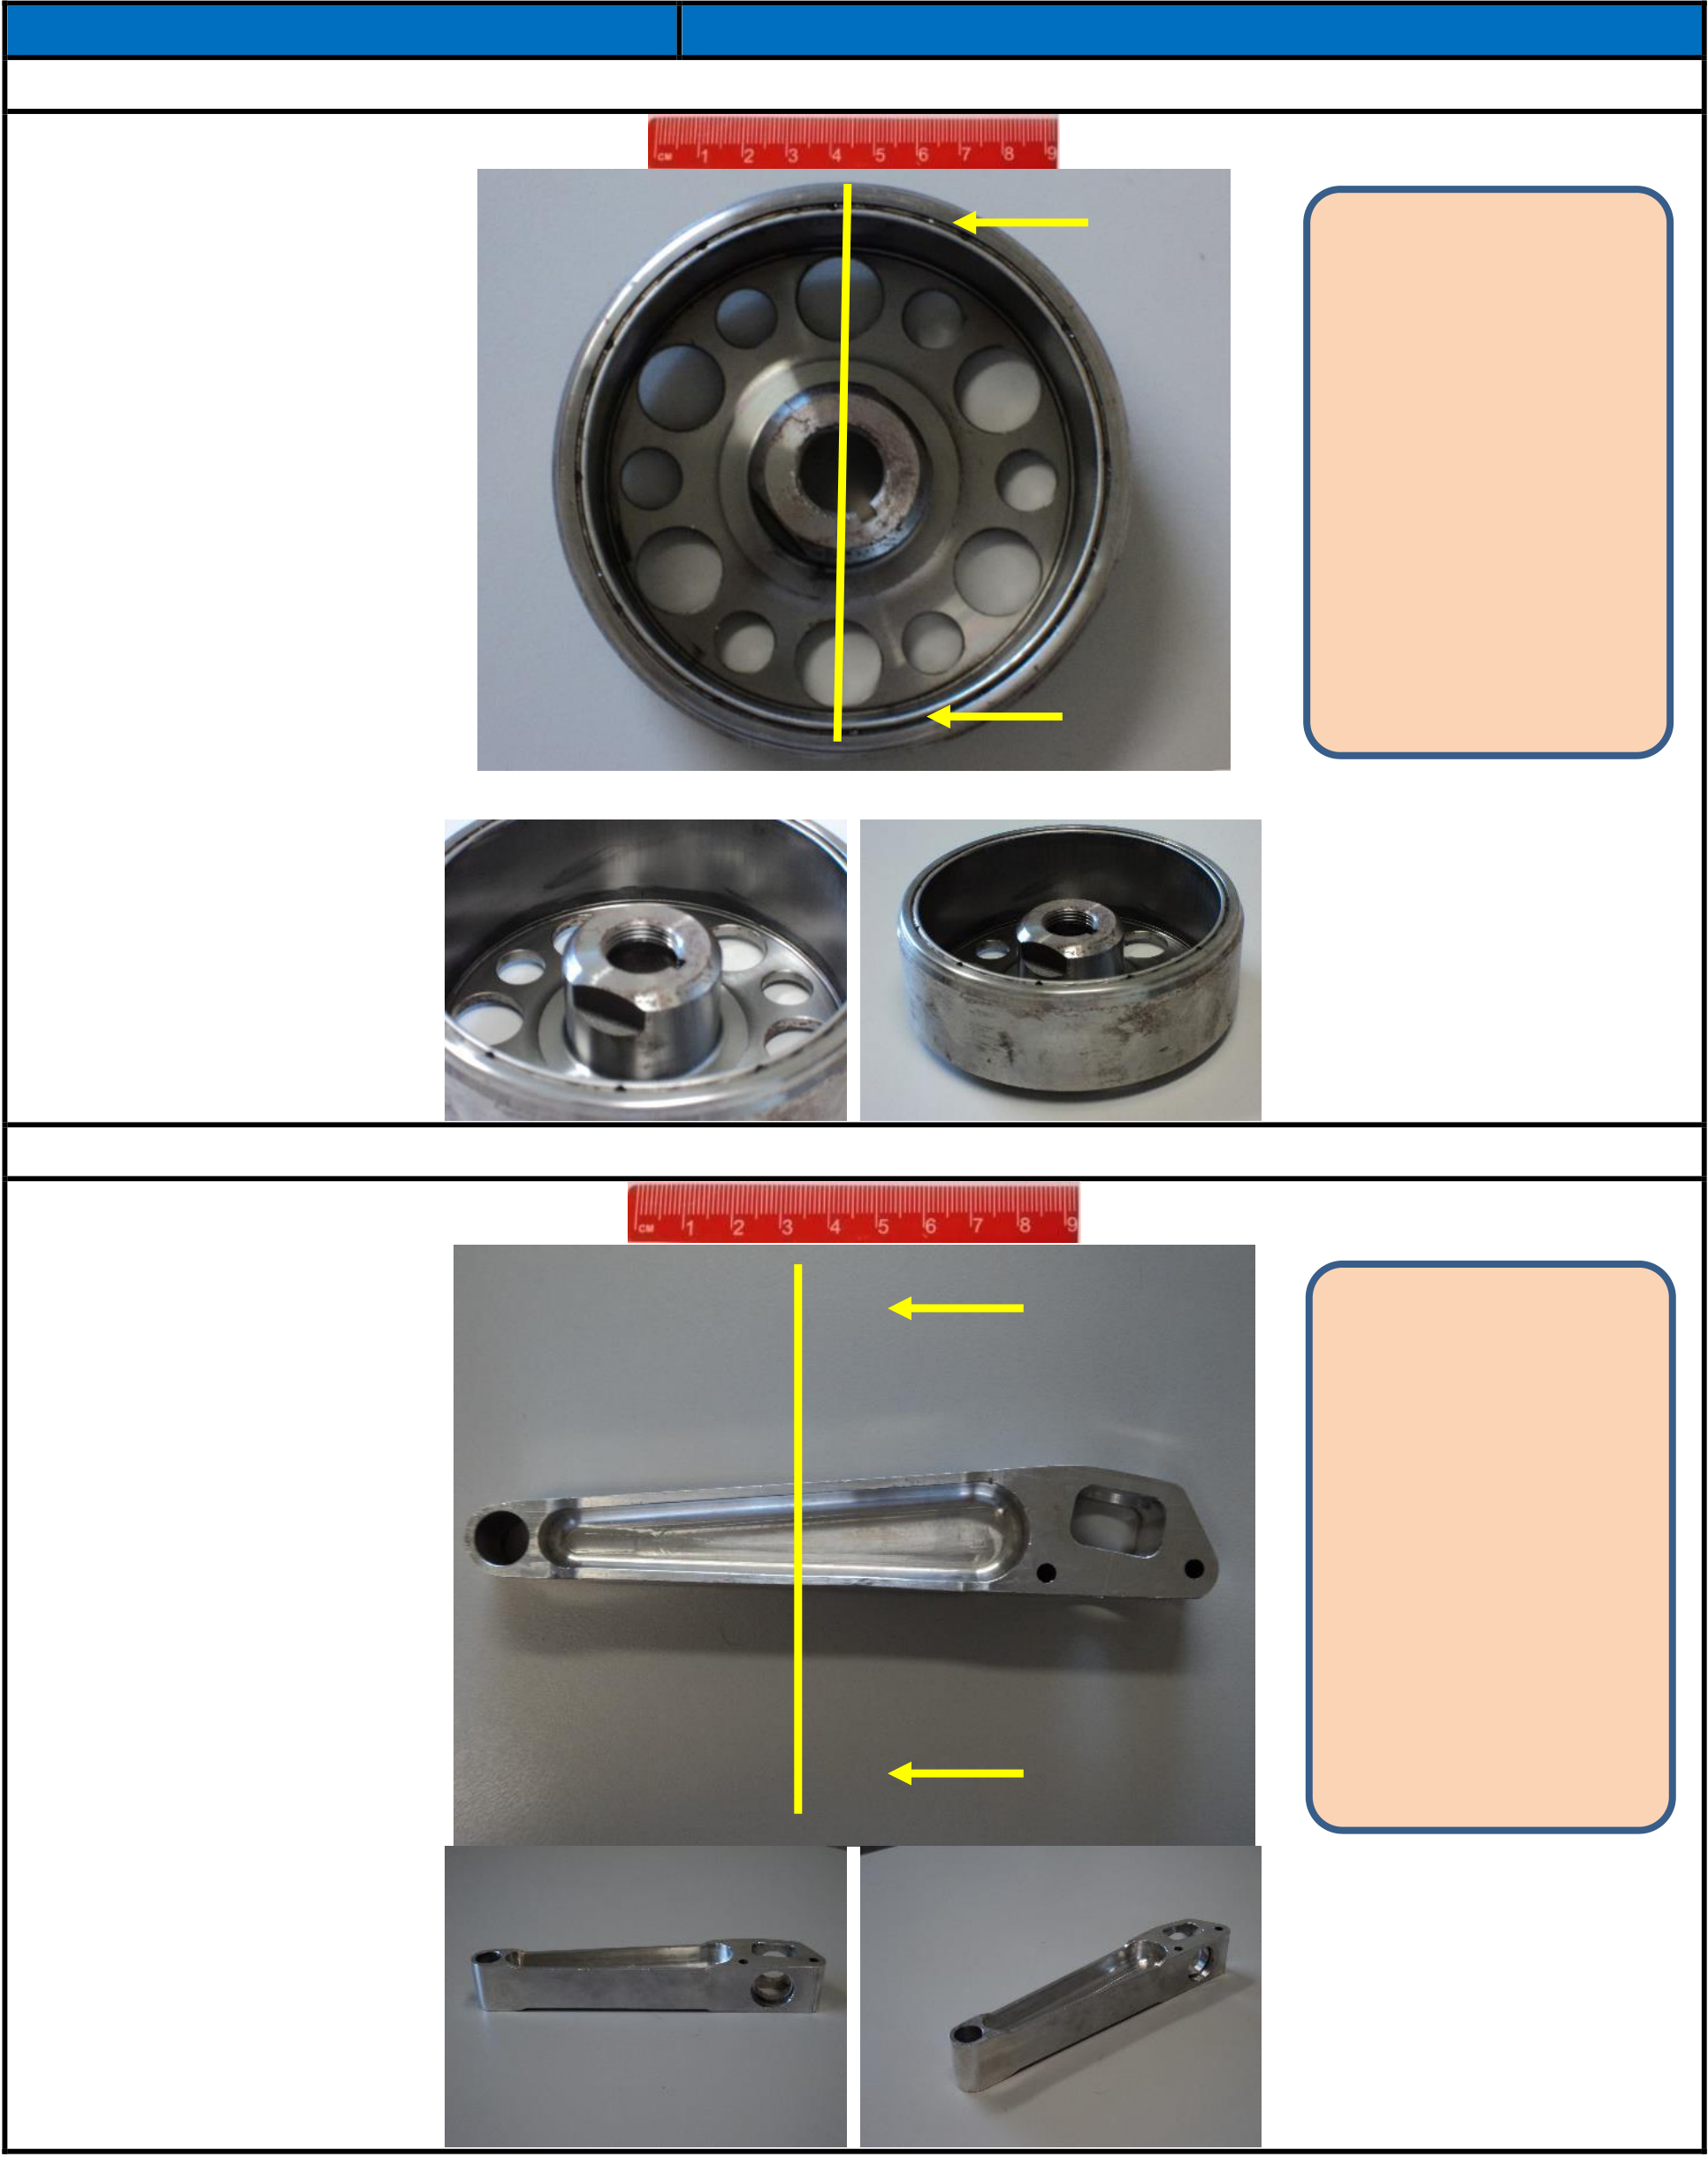
Part 1 (specific view shown is to be drawn)X (1) Adjacent image (top) shows front view. (2)
Red ruler applies to front
view. Use the relative
size of features in the
front view to size other
views. (3) Yellow line
designates location of
sectioning plane and it
passes through the
centre of any features.
|
|---|
Note: Take regular breaks (change posture & stretchhhh) when you are drawing. Suggestions are … every 15-20min (take 2-3min break) … or every 30min (take 5min break) … or every 60min (take 10min break).
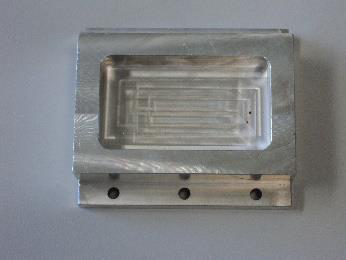
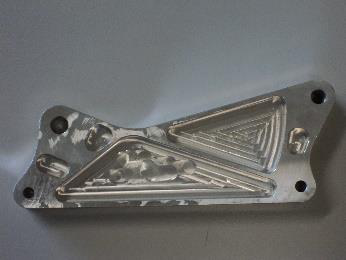
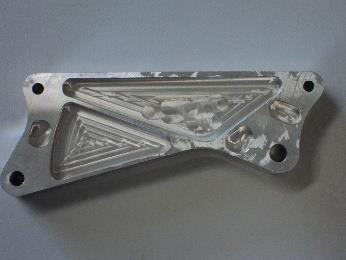
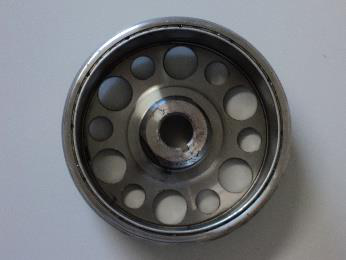
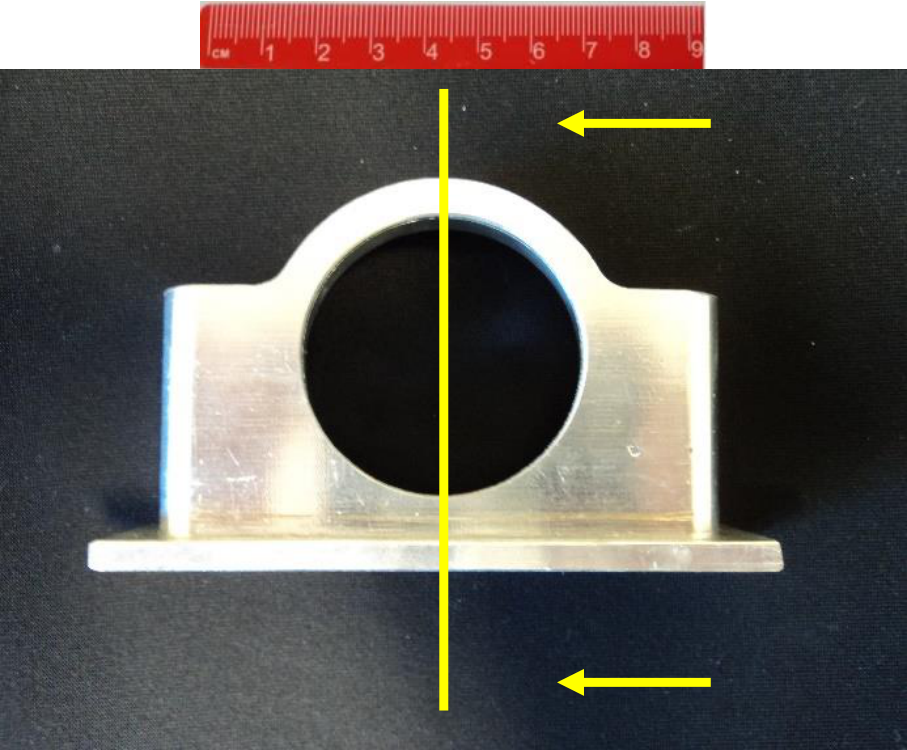
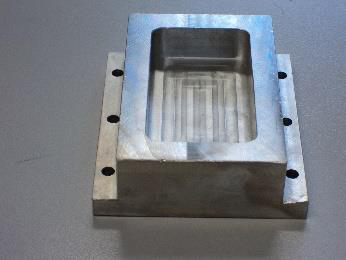
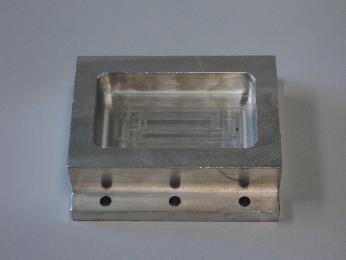
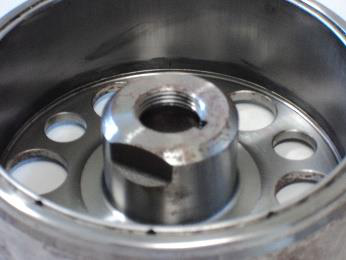
X (1) Adjacent image (top)
shows front view. (2)
Red ruler applies to front
view. Use the relative
size of features in the
front view to size other
views. (3) Yellow line
designates location of
sectioning plane and it
passes through the
centre of any features.
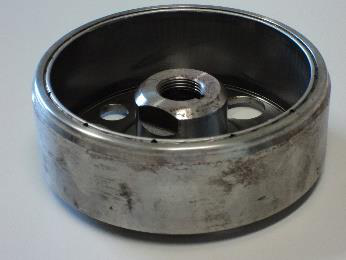
Parts to be drawn 1:1 on
paper. (4) Other images
(below front view) should
X detail other features. be used to size and
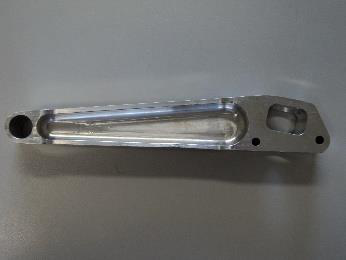
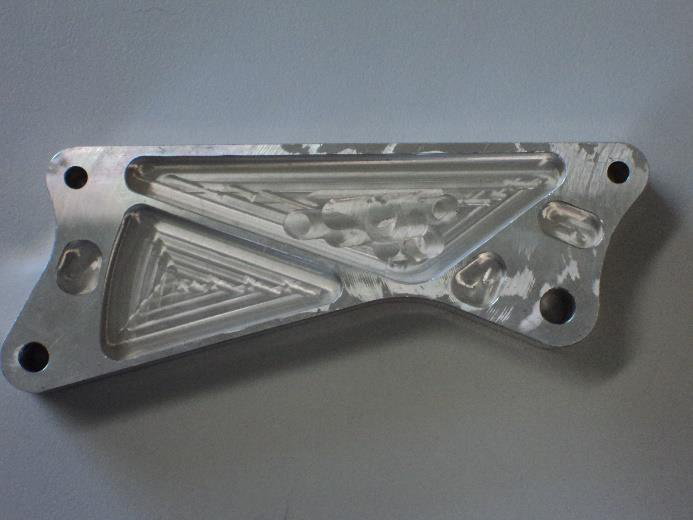
Part 2 (specific view shown is to be drawn)
Page 11


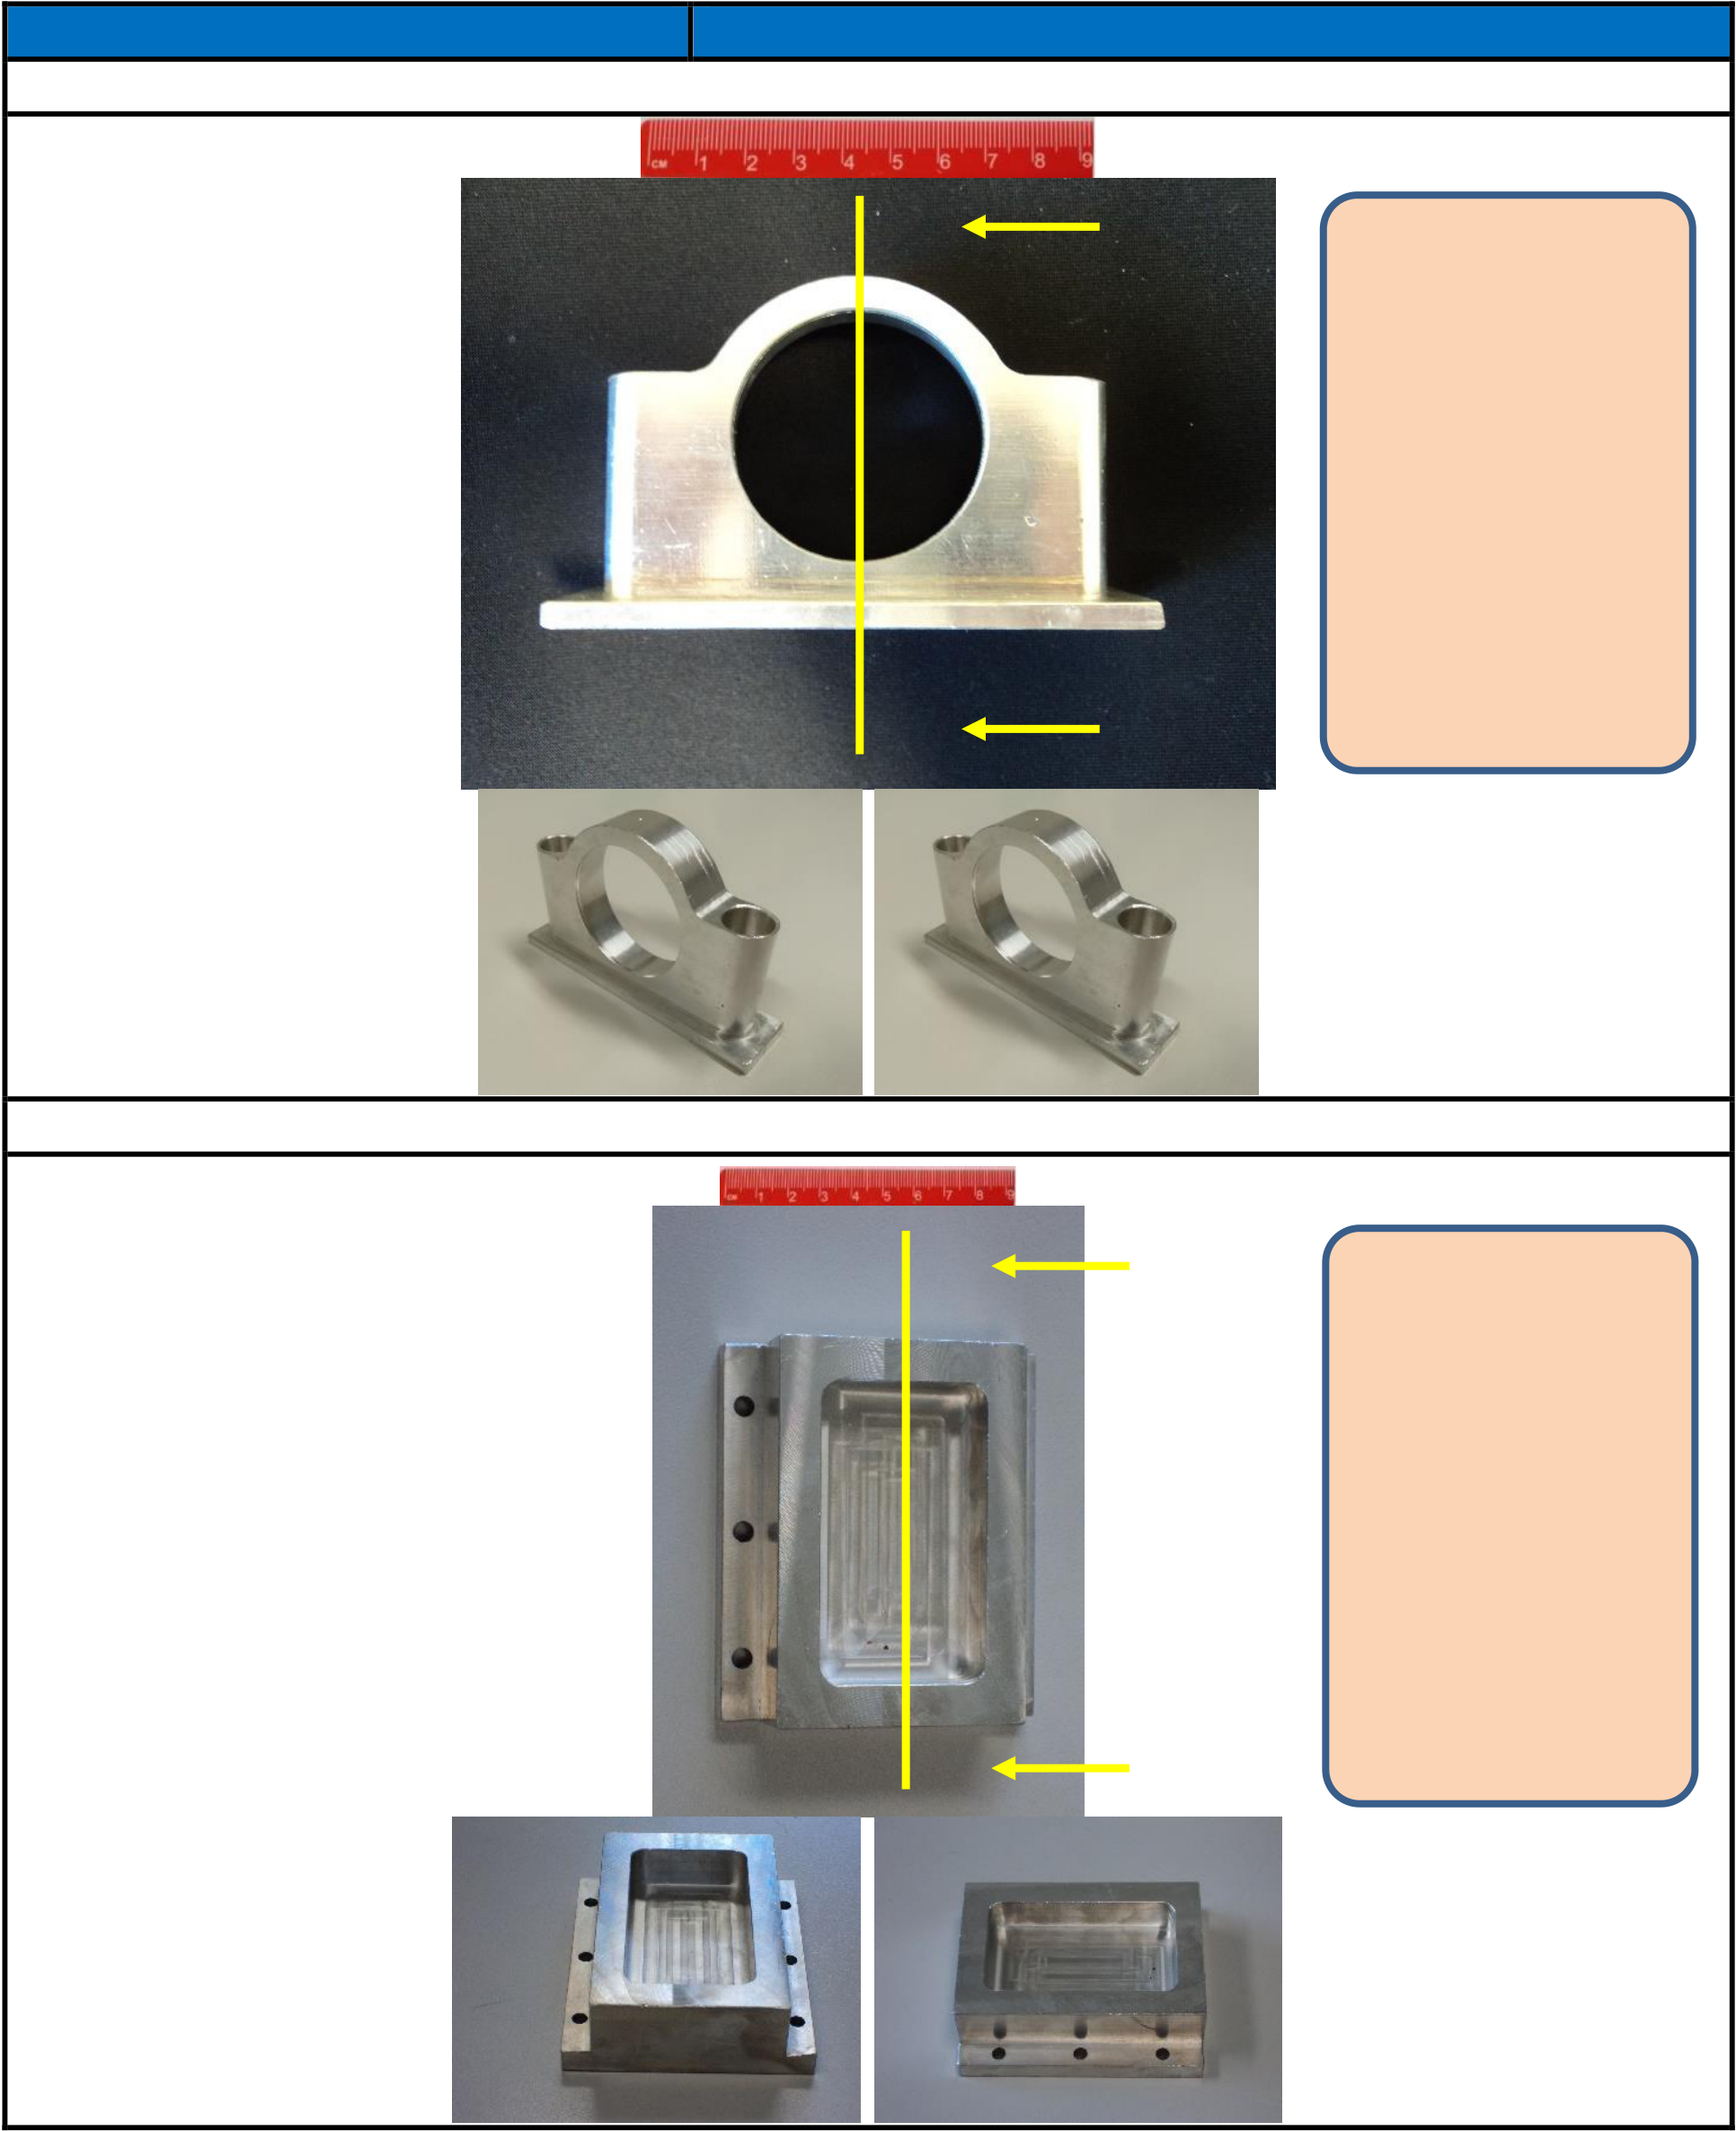
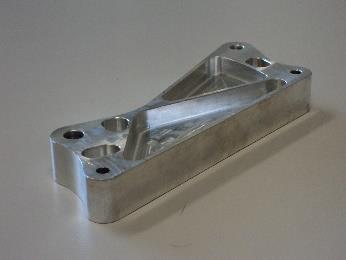
Part 2 (specific view shown is to be drawn)
Y |
|---|


ENM1102 (2021)

Part 2 (specific view shown is to be drawn)
15-20min (take 2-3min break) … or every 30min (take 5min break) … or every 60min (take 10min break).
Page 13
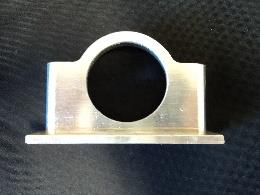
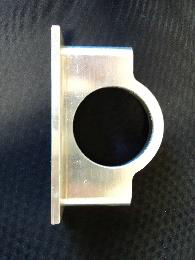
Parts to be drawn 1:1 on
paper. (4) Other images
(below front view) should
be used to size and
X detail other features.
Part 2 (specific view shown is to be drawn)
Page 14


| Enrolment Mode (Lab Session) | On-Campus TUE 1530 - 1730 | (1) Adjacent image (top) shows front view. (2) Red ruler applies to front view. Use the relative size of features in the front view to size other views. (3) Yellow line designates location of sectioning plane and it passes through the centre of any features. Parts to be drawn 1:1 on paper. (4) Other images (below front view) should be used to size and detail other features. |
|---|---|---|
X |
||
Part 2 (specific view shown is to be drawn)
15-20min (take 2-3min break) … or every 30min (take 5min break) … or every 60min (take 10min break).
Page 15
Parts to be drawn 1:1 on
paper. (4) Other images
(below front view) should
be used to size and
X detail other features.
Part 2 (specific view shown is to be drawn)
Page 16